Monday, November 21, 2011

Projects I have finished

Sometimes, when I'm feeling blue, or unproductive, or just bored, I like to take stock of the projects I've managed to finish recently.  Or ever, if things are dark.  Doing so reminds me that despite evidence to the contrary, I am capable of following through and actually completing a project.  Here are some recent highlights.

1.  Sewing Caddy
Right after my husband and I moved to Ithaca in August, we visited a local cooperative bookstore.  We were there to pick up some school books for the aforementioned husband, but I managed to find a book for me, too:  Sew Retro: A Stylish History of the Sewing Revolution.  It had beautiful pictures!  Well researched feminist history!  PROJECTS!  This sewing caddy was one of them, made from a blue and silver jacquard I picked up for our wedding and never used, scraps of left over wedding dress silk, and left over ribbon.  Very handy!


2.  Napkins
 These napkins also came from Sew Retro.  I like them so much, I haven't used them yet because I don't want to get them dirty.  Made from unbleached muslin and more left over wedding ribbon.  I have a thing for polka dots, what can I say?

 3. Sewing Machine Cover
After the caddy and the napkins, I found myself in the mystical project-making groove.  I took advantage of said groove and made this cover for Glenda, my sewing machine (her name used to be Glen).  Blue and silver jacquard with wedding silk again, and the unbleached muslin as a liner.

 4.  Wedding Dress
I got married in June, and I made my own wedding dress.  It was awesome!  I used a Vintage Vogue pattern from 1953.  I bought a royal blue crinoline.  The dress is poofy and swishy and fun and I can't wait to wear it again!  I used a French silk for the lining, and a baby blue dotted Swiss for the facing.  I made the veil and fascinator as well!  All for about $200, baby!


Bonus Blackwork
I didn't do this one, my amazing mother-in-law did.  She made this amazing Vierlande sampler of traditional wedding motifs dating from the late 1700's, and gave it to us as a wedding present.  I just like showing it off whenever possible.  It may be one of the coolest presents I've ever been given!


Seriously, just look at this detail!


This is all as a reminder that when the unfinished project funk has got you down, it can be helpful to look at what you have finished for encouragement.

Of course, I'm going to follow this up by showing you guys some of the abandoned and neglected projects laying around my house, wailing and moaning at me like starving mountain lion cubs.  Be warned, the imagery will be gruesome.

Saturday, November 12, 2011

How to read a pattern chart

One of the most intimidating parts of putting together a sewing project is reading the chart on the back of the pattern.  It doesn't help that half of the text is in French, either.  The pattern chart contains vital information, like the nutritional data on a box of cereal, and mastering it is the key to a successful project.

The first thing you'll notice is a large, usually 4-digit number and a basic drawing of the garments included in the pattern.  We'll use the pattern I'm currently working on as an example: Simplicity 2172.  Each company (Simplicity, Butterick, Vogue, Laughing Moon, etc) will assign a number to each pattern that is unique to their own company.  Much like in Highlander, there can be only one Simplicity 2172.  If you look up Vogue 2172, however, you'll find a completely different pattern.
You like my outfit? I made it myself!
Most patterns will include a range of sizes in one packet.  Sometimes, they offer two or more size ranges for a particular pattern in different envelopes, so you'll want to pay close attention when purchasing.  There's nothing quite so annoying as getting super excited about a pattern, bringing it home, pulling out all the pieces, and realizing that it's way too small for your ample derriere.  Oh horrible,  oh horrible, most horrible!    This is complicated by the fact that sewing pattern sizes and fashion industry sizes are not the same.  If you want to get the correct size, you absolutely have to know how big your ass is in inches (or centimeters), and to do that, you absolutely have to take your measurements.  That's a whole 'nother blog post, though.  For now, we'll assume that you know, or have a pretty good idea of, what your body measurements are.

Objects in drawing may not appear to scale.

Other information that may jump out to you is the number of pieces included in the pattern.  This tells you how many pattern shapes are included in the envelope - not how many "pieces" are in the ensemble (i.e. a 3-piece-suit could have a skirt, jacket and shirt which could consist of upwards of 20 actual pattern pieces).  A sneak peak at one of the directions pages included in the envelope will give you a numbered diagram for all of the pieces - more on that later, when we delve into the mysteries of pattern directions!

The rest of the envelope back is taken up with the yardages chart, and while it may be intimidating, most of it is superfluous information!  Hooray!  Due to labeling laws requiring products in Canada to contain both English and French directions, half of your pattern may be incomprehensible to you (that is, if you took Spanish in high school like I did).  The other half should have English words you recognize, like "fabric" and "notions" and "nap."  If you're anything like me when I started sewing from patterns, "nap" meant "yay I can sleep for an hour before I have to go to class" and "notions" meant "those crazy ideas my friends and I have when we're staying up really late and haven't been taking naps to deal with our sleep debt."  Oh, hark at the babe, such innocence and ignorance!
I'll take my fabric with nap, please!

The great thing about modern patterns is that they will give you a choice of fabrics that will work well with your pattern.  In the case of 2172, Simplicity recommends broadcloth, calico, taffeta, and gingham, with organza for the ruffles.  You don't have to restrict yourself to the suggested fabrics, but you may want to leave experimentation until you've got a firmer grasp on how different materials and weaves perform.  The pattern will also tell you what notions (or "hardware") your pattern requires - basically, the thread and things other than fabric that you'll need to put your pattern together.  Buttons, hook & eye closures, and zippers are all really common for garments; and various kinds of boning or horsehair may be required for very tailored or formal pieces.
Not this kind of horse hair.

The rest is fabric yardages (or, how much fabric you need to buy, measured in yards; 3 feet = 1 yard), and this is where it can get tricky.  The chart is broken up between each garment included in the pattern.  For example, our Simplicity 2172 has a section for coat, bustier, and skirt.  Each section will list a kind of fabric, and you follow it over to the column lining up with your pattern size to find out how much of that fabric you need.  The facing - or "fashion" fabric, which everyone will see on the outside - is usually simply listed as "45" or "60".  Fabric comes in different widths, and the amount you need depends on how wide your fabric is; the narrower the fabric, the more yards you'll need.  45" and 60" are both pretty common, but you may also see 54" or other oddball widths depending on where you're shopping or what kind of fabric you're looking at.  The asterisks indicate whether the fabric widths take into account the nap or not.  You wont really need to worry about this unless you're using a fabric like velvet or velour, where the "nap" refers to the threads that stick up to make the fabric fluffy.  If you are using a fabric with nap, you may need to buy extra yardage, so you can cut your pieces out all along the same "grain".

When I'm getting ready to go fabric shopping, I like to re-write the chart so that it contains only the information I need - my sizes and yardages.  Then I add up all the yardages for each garment so I know how much of each fabric I need for the entire project, and write that all down.  I find it way to easy to get confused while shopping, and many stores get grumpy if you try to return the two extra yards of that 40% off silk you bought but don't need.  Measure twice and cut once applies here!  Or rather, double check your numbers, and be nice to the cutting table clerk.  Those shears are sharp!

Not cool, dude.

The bottom of your chart may include finished garment measurements - what your measurements will be while wearing the garment), but I mostly ignore this part.  I've never really had to know how big my bust is in a particular shirt, but if you're mixing pieces from different patterns (such as might happen in costuming), you may need to know if one layer will actually fit under another.

And there you go!  Now you know how to read the back of a pattern envelope!  It really isn't so bad once you get used to it.


Project 1: getting started

The first project I'll be working on for this blog is Simplicity pattern #2172, a "Victorian inspired steam punk costume."  I think it's more "sort-of Edwardian inspired", since there frankly isn't near enough architectural underwear involved for it to be truly Victorian, and it has the cleaner, longer lines of later fashion.  I'm going to do it in colors that match the Ithaca League of Women Rollers (my roller derby league) so that I can wear it to league events and fundraisers.  The skirt will also be used in another costume project, which will be elaborated on another time (the idea is still cooking in my head).  The skirt and coat will be a darker grey color.  I plan on making two bustiers, one in bright red and one in royal blue, to match either the SufferJets or the Bluestockings respectively.  The league has an historical feminism theme to it, so a steam-punky suffragette look should fit right in.  If I feel fancy, I may even make a sash to go with it!

I'll be going through each of the steps in putting together this project.  It should be digestible for beginners or people with no sewing experience, but hopefully more advanced sewers will get something out of it as well.  Please remember that I'm not a professional.  I mostly taught myself how to sew, and I've only been using a machine for the last few years.  The way I do things may or may not work for anyone else (or even myself, in the long run).  

With that disclaimer out of the way, let's begin.  The first step of any project is to figure out what fabric and notions or "hardware" you need, and for that, you have to take your measurements.  Keep in mind that pattern sizes are very different from fashion sizes.  For instance, I wear a 14 or 16 in pants normally, but my pattern size is usually either 18 or 20.  It all depends on what company produced your pattern and even what kind of pattern it is.  The safest bet is always to take your measurements first, and use the chart on the back.  Guessing leads to misery, believe me.

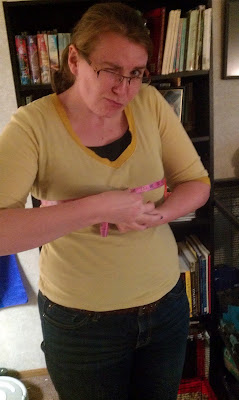
In this case, we have four measurements to take:  bust, waist, hip (9" below waist), and back-neck to waist.  If you aren't experienced in taking your own measurements, get a friend to help.  I've done this a lot, and I'm pretty familiar with my body, so I usually do it by myself, just to check that I'm still the same size.  Once you have your measurements, you can refer to the chart on the back of the pattern to figure out what size you'll be cutting, and how much fabric you'll need (you can get a look at the chart for this pattern by following the link above).  Don't worry if your measurements don't plot you into the same size for each body part - go with the larger size for calculating fabric quantity.  For example, my measurements put me at 40" bust (size 18), 35" waist (size 20), 44" hip (size 20) and 15 1/2" neck to waist (size 6).  I am bottom heavy and freakishly short-waisted, so I'll be buying enough fabric to make a size 20 costume, then blending the bust of each piece into a size 18, and shortening the waist.  It sounds more complicated than it is, I promise.

Bewbs!

Now I have to do some math to figure out how much total of each kind of fabric I'll need to buy.  The "facing" or "fashion" side (i.e. the side you can see while the garment is worn) of the coat and skirt will be made out of the same grey fabric, and I'll be making two bustiers instead of the one indicated by the pattern.  On the chart, you're given options for varying widths of fabric (45" and 60", usually); the wider the fabric, the less yardage you need.  I found the column for size 20, and I followed it down to get the following fabric quantities for each piece of the garment.  For example, for the coat, I need 5 yards of 45" grey fabric (or 3 7/8 yards of 60"), 4 1/8 yards of lining fabric (the part that goes on the inside, closest to your skin; lining only comes in 45" widths), 3/4 yards of contrast fabric for the sleeve and neck ruffles, and 3/8 yard of 20-25" lightweight fusible interfacing.  For me, its easier to go through the chart and make a list for each piece of the fabric quantities I need, then add it all up at the end to make my "shopping list" of fabric totals, for when I got to the fabric store.  

Now I can go rummaging around in my hoard to see what I've already got, and can strike from the list.  I've got enough black two-hole buttons or pearly four-hole buttons for the bustiers.  I've also got hook & eyes up the wazoo.  From my experience in corsetry, I've found cable ties to be a cheap, washable alternative to boning, and much easier to work with;  I always have a handful of 1/4" wide cable ties on hand.  And finally, I've got large quantities of unbleached muslin on hand from when I made my wedding dress, so I can skip buying lining as well.

I tried to clean out my notions drawer before taking a picture.  Still prety messy, though.


My final shopping list looks something like this:
  • Grey broadcloth or taffeta:  11 1/4 yard of 45" wide (or 10 yd of 60")
  • Lining: 6 1/8 yd of 45"
  • Contrast (organza): 3/4 yd of 45" or 60"
  • Lightweight fusible interfacing (20-25" wide): 5 1/8 yards
  • Blue calico or gingham: 1 1/8 yd of 45" (or 1 yd of 60")
  • Red calico or gingham: 1 1/8 yd of 45" (or 1 yd of 60")
  • 1/4" chain trim: 3/4 yd
  • 1/4" featherweight boning: 8 yd
  • 7/8" buttons: 4 (for coat)
  • 3/8" buttons: 28 (2 sets of 14 per bustier)
  • Small swivel hooks: 2 
  • 7" grey zipper (for skirt)
  • 12" separating zippers (for bustier): 2 - 1 blue, 1 red
  • Hook & eye: 3
Here you can see some of the stuff I've already got for this project, including the pattern itself, cable ties, and buttons.
Next up will be my favorite part: fabric shopping!