I'll be going through each of the steps in putting together this project. It should be digestible for beginners or people with no sewing experience, but hopefully more advanced sewers will get something out of it as well. Please remember that I'm not a professional. I mostly taught myself how to sew, and I've only been using a machine for the last few years. The way I do things may or may not work for anyone else (or even myself, in the long run).
With that disclaimer out of the way, let's begin. The first step of any project is to figure out what fabric and notions or "hardware" you need, and for that, you have to take your measurements. Keep in mind that pattern sizes are very different from fashion sizes. For instance, I wear a 14 or 16 in pants normally, but my pattern size is usually either 18 or 20. It all depends on what company produced your pattern and even what kind of pattern it is. The safest bet is always to take your measurements first, and use the chart on the back. Guessing leads to misery, believe me.
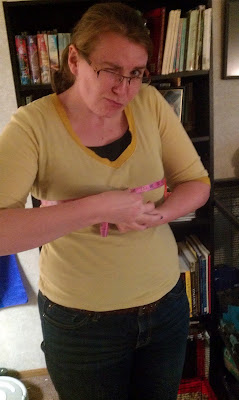
In this case, we have four measurements to take: bust, waist, hip (9" below waist), and back-neck to waist. If you aren't experienced in taking your own measurements, get a friend to help. I've done this a lot, and I'm pretty familiar with my body, so I usually do it by myself, just to check that I'm still the same size. Once you have your measurements, you can refer to the chart on the back of the pattern to figure out what size you'll be cutting, and how much fabric you'll need (you can get a look at the chart for this pattern by following the link above). Don't worry if your measurements don't plot you into the same size for each body part - go with the larger size for calculating fabric quantity. For example, my measurements put me at 40" bust (size 18), 35" waist (size 20), 44" hip (size 20) and 15 1/2" neck to waist (size 6). I am bottom heavy and freakishly short-waisted, so I'll be buying enough fabric to make a size 20 costume, then blending the bust of each piece into a size 18, and shortening the waist. It sounds more complicated than it is, I promise.
 |
| Bewbs! |
Now I have to do some math to figure out how much total of each kind of fabric I'll need to buy. The "facing" or "fashion" side (i.e. the side you can see while the garment is worn) of the coat and skirt will be made out of the same grey fabric, and I'll be making two bustiers instead of the one indicated by the pattern. On the chart, you're given options for varying widths of fabric (45" and 60", usually); the wider the fabric, the less yardage you need. I found the column for size 20, and I followed it down to get the following fabric quantities for each piece of the garment. For example, for the coat, I need 5 yards of 45" grey fabric (or 3 7/8 yards of 60"), 4 1/8 yards of lining fabric (the part that goes on the inside, closest to your skin; lining only comes in 45" widths), 3/4 yards of contrast fabric for the sleeve and neck ruffles, and 3/8 yard of 20-25" lightweight fusible interfacing. For me, its easier to go through the chart and make a list for each piece of the fabric quantities I need, then add it all up at the end to make my "shopping list" of fabric totals, for when I got to the fabric store.
Now I can go rummaging around in my hoard to see what I've already got, and can strike from the list. I've got enough black two-hole buttons or pearly four-hole buttons for the bustiers. I've also got hook & eyes up the wazoo. From my experience in corsetry, I've found cable ties to be a cheap, washable alternative to boning, and much easier to work with; I always have a handful of 1/4" wide cable ties on hand. And finally, I've got large quantities of unbleached muslin on hand from when I made my wedding dress, so I can skip buying lining as well.
 |
| I tried to clean out my notions drawer before taking a picture. Still prety messy, though. |
My final shopping list looks something like this:
- Grey broadcloth or taffeta: 11 1/4 yard of 45" wide (or 10 yd of 60")
Lining: 6 1/8 yd of 45"- Contrast (organza): 3/4 yd of 45" or 60"
- Lightweight fusible interfacing (20-25" wide): 5 1/8 yards
- Blue calico or gingham: 1 1/8 yd of 45" (or 1 yd of 60")
- Red calico or gingham: 1 1/8 yd of 45" (or 1 yd of 60")
- 1/4" chain trim: 3/4 yd
1/4" featherweight boning: 8 yd- 7/8" buttons: 4 (for coat)
3/8" buttons: 28 (2 sets of 14 per bustier)- Small swivel hooks: 2
- 7" grey zipper (for skirt)
- 12" separating zippers (for bustier): 2 - 1 blue, 1 red
Hook & eye: 3
 |
| Here you can see some of the stuff I've already got for this project, including the pattern itself, cable ties, and buttons. |
Next up will be my favorite part: fabric shopping!
No comments:
Post a Comment